Showing posts with label recipes. Show all posts

Thursday, September 1, 2011

Vanilla Extract Experiment Phases 1 and 2

My first food love was definitely cooking, but I always found it to be such a false division between those who cook and those who bake. Sure we all specialized or gravitate toward being more artistic or more scientific, but I don't think you can be a great cook without knowing a little about ratios and reactions at least intuitively and likewise when it comes to baking, without that great inspiration of mixing and matching flavors its hard to go beyond chocolate chip cookies. (Not that they aren't delicious!) If you're going to love one, you should love the other.

My mom baked a lot and when I went to college I started doing the same. There are two ingredients I almost always use more than the recipe calls for: cinnamon and vanilla extract. I am starting to work on a bunch of muffin recipes and after seeing a few videos on how to make vanilla extract I decided I should try it!

Seems simple enough... join me on the journey:

Phase 1: Gathering the Ingredients

Vanilla: Apparently vanilla is the 2nd most expensive spice in the world after saffron (Joy of Baking). So being the recent graduate student and food truck worker that I am, I had to set sail on the world wide web and find the best deal. If you find a better deal, let me know, but so far it seems Beanilla seems to have the best prices with a Tahitian pod costing $1.25 or 10 for $7.99. So far all I know is the smell but it's absolutely intoxicating. My roommate was joking that I was getting high off the beans. If there is an intoxicating effect I sure was feeling it!

Mason Jar: Some sites suggest you can use the bottle of booze, but I wanted a wider mouthed jar and a good seal so I opted for a mason jar. You know those jars people use for canning. Well I had a dual purpose for getting a 12 pack of quart sized mason jars and I'll give you one guess. That's right canning will likely be an upcoming post! I chose Ball Mason Jars because they have a pretty good reputation and you can order online and pick-up at an Ace Hardware for $11.49

Vodka: Supposedly any 80 proof alcohol should work to soak up the flavor of the bean with lighter or weaker flavored alcohols giving you a purer vanilla taste. To me vodka tastes like water with some fire and rubbing alcohol mixed in (sorry vodka fans... and Russians), so it seemed the closest to giving a neutral taste. Some websites recommend rum to impart a little rum flavor with the vanilla for certain recipes. I've also read of bourbon used for a similar reason.
Being ignorant of most alcohol except for some wines, I decided to go with low to middle shelf classic: Smirnoff. (Quick Yakov Smirnoff style joke: Soviet Russia, vanilla extracts you!... now back to your regular scheduled blog).

Phase 2: The Process (Recipe)

Vanilla extract actually couldn't be easier.
  1. Use a sharp paring knife to cut a slit down one of the flat sides of each pod.
  2. Place pods in a mason jar or any other tight sealing jar. Alternatively you can empty the alcohol bottle and place the vanilla pods into the bottle.
  3. Fill jar with your chosen alcohol enough until pods are covered (or close... I'm hoping my slightly exposed beans don't cause any issues!)
  4. Seal jar (if you're worried you can follow the steps to properly seal a mason jar, I was lazy and just screwed it shut)
  5. Give the jar of extract a good shake. *Insert lousy shakeweight joke here*
  6. Store in a dark space and shake a few times a week for a minimum of a month. At least 2 months seem to be recommended and 6 months according to Ina Garten (the Barefoot Contessa) is optimal. You'll know it's ready or close to ready when it's nice and dark.
I will be following up with a blog about the finished product and tweeting if not blogging with pictures of my extract at each week. I'm also going to include ways to use the soaked pods (apparently it's easy to squeeze out a vanilla paste) and how to replenish your extract (add more beans occasionally and refill vodka to the top).
Bottom Line

You may have wondered why I included prices in phase 1. Well I have two reasons to make my own vanilla: First is the reason to make almost anything at home. To control the ingredients and quality. This way I know the beans, booze and bottle (rather jar, but alliteration is fun) that are used.

Secondly it ends up being much cheaper. Here's some math for you. Yes I know you like math.

750ml bottle of vodka: $14.29
32oz mason jar (12.18/12): $1.02
10 Tahitian vanilla bean pods: + $11.60
$26.91 for roughly 750ml (or 25.36 ounces) of extract

As opposed to the vanilla I buy at Giant which is $3.14 for 2 ounces or $39.82 for the same 750ml/25.36 ounces.

So I saved $12.91... but wait! As I will explore in a future blog, the pods can be reused and recycled either for more extract or for their vanilla flavor rich innards. so that $12.91 is just the initial savings. So next time around I might not need as many pods and I will already have a jar. Now to steal some vodka at parties. Think anyone will notice the distinct smell of vanilla when I randomly open my extract and dump some vodka in and run?

Stay tuned food fans!

Thursday, February 17, 2011

Pesto, Pesto Man... I've Got To Be a Pesto Man!

Pesto is wonderful. Not much else to stay. You take herbs and you mix it with garlic, cheese, olive oil and nuts. You have a wee bit of texture from the nuts, a rich herb flavor and some cheese. Really what's not to like?

I also find pesto to be amazing because it is so versatile. Delicious on sandwiches with fresh mozzarella, incredible in place of sauce on pizza or amazing on just simple pasta. Here is my recipe for basil pasta plain, simple, but fantastic. To be completely fair I adapted Ina Garten's which can also be found here. The only difference is that I prefer pine nuts so I used them in place of walnuts.

Basil Pesto
Prep Time: 10 minutes | Yields: 4 cups

Ingredients:
  • 1/2 cup Pine nuts
  • 3 tablespoons Garlic, chopped (about 9 cloves)
  • 5 cups Basil leaves, packed
  • 1 teaspoon kosher Salt
  • 1 teaspoon freshly ground black Pepper
  • 1 1/2 cups Olive oil
  • 1 cup Parmesan, grated
Directions:
  1. Place pine nuts and garlic in a food processor.
  2. Process for 30 seconds.
  3. Add basil, salt and black pepper.
  4. Slowly pour olive oil and processor is running.
  5. Continue processing until mixture is pureed.
  6. Add cheese and puree an additional minute
  7. Serve in any way listed above or anywhere else you think it would be good! Store in fridge or freeze.

Tuesday, February 15, 2011

Bacon Bonanza #3: The BBC (Bacon, Broccoli and Cheese)

Now for the final recipe in the bacon bonanza. This one was inspired by my friend Lauren who told me I should ad bacon to mac & cheese. I could also say that this was inspired by another friend, Michelle, who I made mac & cheese with a few weeks ago. She suggested we add extra cheese and broccoli, which seemed painfully obvious to me after hearing it but for some reason I've never really done.

Thus the BBC was born: Bacon, Broccoli and Cheese. I hate to admit I used a box for the mac & cheese, but if it is any consolation it was a Trader Joe's variety! I am pretty confident I will be exploring homemade mac & cheese recipes soon enough so I may very well replace this at some point. But if you're a fellow grad student, undergrad or simply breaking the glass to grab that emergency box of mac & cheese here's a good way to jazz up your cheesy cheap dinner.

This was by far my favorite bacon application. The added texture, saltiness and slight meat flavor of the bacon really added to the whole dish.

Bacon, Broccoli and Cheese
Prep Time: 30 minutes

Ingredients:
  • One box of your favorite macaroni and cheese/shells and cheese/whatever shape and cheese. (I used Trader Joe's Organic White Cheddar and Shells. I highly recommend finding an organic variety. They're not much pricier and I like to think the cheese is real or more real despite still being a powder.)
  • Milk (amount as specified by box... I really discourage using water if you want to a good creamy sauce)
  • Butter (amount as specified by box... this really adds to any box brand. Why oh why do they claim this is optional?)
  • 1 cup Cheddar cheese, grated. (I used a slightly sharp yellow cheddar, but you can pick what you'd like. I thought it was a good compliment to my white cheddar box flavor.)
  • 1-2 cups Broccoli, chopped into small florets. (I used one head so unless it's tiny or massive just use one head's worth).
  • 3-4 strips of Bacon, diced into bacon bits.
Directions:
  1. Follow recipe on box.
  2. After mixing in cheese mix, milk and butter, add additional cheese, broccoli and bacon.
  3. Cook on low heat and stir until cheese has melted and broccoli begins to tender.
  4. Enjoy!

Saturday, February 12, 2011

Bacon Bonanza #1: The Bacon Basics


Don't worry, I didn't JUST make the bacon so no food poisoning or rotten meat here. Just a case of the lazy blogger. This will be the first of a 30 days blogging blitz. In effort to make blogging a habit I'm going to post something everyday until March 16th. Ready? Set? Eat!

Last time on the blog I was trying to figure out what to do with 12 strips of bacon. After consulting with many friends and summoning the wise oracle of Google I settled on baking them. Some friends urged me to fry them, but others assured me baking was a good idea and many blogs from both experts and fellow amateurs said baking was the best way to get quality bacon without lots of mess or energy.

I ate two strips plain just for the sake of tasting and then two the only way a grown man can properly enjoy his bacon served plain: with eggs forming eyes and the bacon forming a smile for a smiley face breakfast!

At least one friend and one blog also suggested baking the bacon with brown sugar on it. I have to say out of this first bacon-y morning this was my favorite thing. The combination of the sweet and meaty saltiness was actually good. Everything else was only ok. I can see why people love bacon, but I'm still not converted.

Basic Bacon Prep
Prep Time: 11 minutes | Servings: Based on the package/your bacon capacity

Ingredients:
  • Bacon
  • Yeh, that's really about it for this one.
Brown sugar variation:
  • 1 tablespoon Brown sugar per bacon strip. (I highly suggest dark brown)

Directions:
  1. Preheat oven to 400 degrees.
  2. Line a cookie/baking sheet with foil. I recommend using one that has at least some depth (the fat will render out).
  3. Lay bacon strips flat without them touching each other.
  4. Bake in middle rack for 6 minutes
  5. Using tongs or a spatula flip bacon over.
  6. For brown sugar variation: Sprinkle tablespoon of brown sugar on each strip desired
  7. Return to oven for another 5 minutes
  8. Let cool on paper towel (to soak up excess fat. As it cools it will continue to crisp.)

Friday, January 14, 2011

Resolution Item 1: Brussel Sprouts

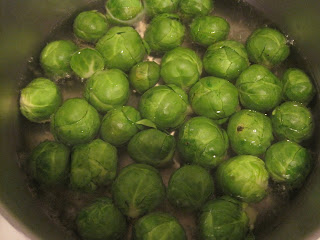
As I shared in a previous post, I am going to try (0r retry) two foods every month this year. First up is brussel sprouts! Why? Well to be honest my friend Alexis offered to prepare some for me and then I found a whole stalk at the store and thought it looked really cool:

Aside from my friend using previously frozen sprouts sauted in olive oil with garlic salt. My reaction that they tasted like a veggie version of meatballs with a bit of mushiness. I wanted to try myself and added two more simple recipes.

Roasted Brussel Sprouts

Prep Time: ~25 minutes | Serves: 3

Ingredients:
  • 1/2 pound Brussel sprouts, halved rinsed and drained
  • 1 tablespoon Olive oil
  • 2 cloves Garlic, minced
  • 1/2 teaspoon Paprika
  • Salt, to taste
  • Ground black pepper, to taste
Directions:
  1. Preheat oven at 450 degrees.
  2. In a pan toss sprouts with olive oil and spices until coated evenly.
  3. Bake for 20 minutes or until lightly browned and tender. Stir about halfway through.
___________________________________________________________

Brussel Sprouts in Lemon Butter Sauce

Prep Time: 10 minutes | Serves: 3

Ingredients:
  • 1/2 lb Brussel sprots
  • 2 tablespoons unsalted Butter
  • 2 cloves Garlic, minced
  • 1/2 teaspoon Paprika
  • 1/2 teaspoon dried Oregano
  • Juice of half a Lemon
  • Salt, to taste
  • Ground black pepper, to taste
Directions:
  1. Bring an inch of water to boil in a pot.
  2. Add Brussel sprouts to water and return to boil, then reduce to low heat.
  3. Simmer for 8 minutes.
  4. In a medium to large skillet melt butter, then add garlic.
  5. When garlic begins to brown (about 60 seconds) add remaining ingredients. Bring to boil.
  6. Reduce heat to low and transfer drained brussel sprouts.
  7. Toss to coat in butter sauce.

My conclusion: I still don't love brussel sprouts, all three recipes came out a little two bitter and mushy for me, but I would be happy to prepare or eat them again if necessary. Happy to hear tips on how to overcome the texture or bitterness problem if I'm doing something wrong!


Monday, January 10, 2011

Mario Batali's Tomato Sauce

From time to time I'm going to post recipes that aren't mind, but that I made and wanted to share. I will always give credit and post the original link and only use recipes that are either free online or otherwise public domain.

Original site for recipe is found here.

Over the last week I have been cooking recipes that are easily freezable so that during the semester I could easily thaw and have a few meals when I don't have the time to cook. In fact here's a dramatization:

Stomach growls
Me: Well it's either I starve, pick off a helpless undergrad and be known as the cannibal grad student or worse: eat ramen.
Opens freezer
Me: I have frozen pasta sauce, pesto and chili! I'm saved.
Audience applauds...freshmen rejoice

AND SCENE!

Well onto the recipe. This is a basic tomato sauce that worked fantastically on my pasta, but if you're ok with some extra flavor (who isn't?) and chunkiness (thanks to tomato bits), then you could use the sauce for any recipe calling for tomato sauce.

Basic Tomato Sauce

Cooking time: 45 minutes | Yields: 6 cups

Ingredients:
  • 1 Spanish onion, cut into 1/4-inch dice
  • 4 cloves garlic, thinly sliced
  • 3 ounces virgin olive oil
  • 4 tablespoons fresh thyme (or 2 tablespoons dried)
  • 1/2 medium carrot, finely shredded
  • 2 - 28-ounce cans of tomatoes hand crushed and mixed well with their juices
  • Salt, to taste
Directions:
  1. Saute the onion and garlic in the olive oil over medium heat until translucent, but not brown (about 10 minutes).
  2. Add the thyme and carrot and cook 5 minutes more.
  3. Add the tomatoes and juice. (I hand crushed them as I added them to the pot, but I highly recommend you ensure they are deep in the pot when you squeeze them.* Remove from heat or at least turn the stove off while you do this.)
  4. Bring to a boil, lower the heat to just bubbling, stirring occasionally for 30 minutes.
  5. Season with salt to taste.
  6. Serve immediately, or set aside for further use. The sauce may be refrigerated for up to one week or frozen for up to 6 months.
Serving suggestions:

With chopped mushrooms
  1. Chop 4-5 white mushrooms into fourths and saute in olive oil until lightly brown.
  2. Mix in 1 cup pasta, 1/2 cup tomato sauce and bring sauce to a boil.
  3. Reduce and add about a teaspoon of chopped fresh basil and a small handful of Parmesan cheese (maybe 1/4 cup, I didn't really measure).
  4. Mix to combine until cheese is melted. Serve immediately!
With ground beef
  1. Add a cup of ground beef (browned and drained of fat) to 4 cups of tomato sauce. Bring to a boil and then let simmer for 15 minute.
  2. Serve with fresh pasta like above.
*Why the asterisk? Well this blog is about us all learning and you can learn from my mistakes. Why should you be careful squeezing the tomatoes? Well check out my hoodie after making this sauce:

Wednesday, January 5, 2011

Compost Veggie Stock

Foodies, environmentalists and cheapskates unite! If you've had a recipe that called for vegetable stock and wondered why you're paying 2-4 dollars on mass produced store brand vegetable stock from a box? Or have you ever stared at your compost wondering if you could stretch those delicious vegetable even further before turning it into worm and plant food?
No?! Hmm guess I am a weird one. Oh well... I still think this is neat trick that allows you to triple the usefulness of one humble kitchen vegetable. With this recipe and composting you can use one vegetable to:
  1. snack on or use normally in a recipe
  2. make this vegetable stock out of its remains (seeds, peels, skins, etc)
  3. add to your compost, your neighbor's compost or your local community garden's compost.
I have to admit I am no expert on vegetable stock and have only tried it in its pure a few times when I was using a store bought box for a recipe, but I heard about this idea and wanted to try it. The end result was certainly similar to the box type and certainly had that good earthy/vegetabley quality to it. It wasn't bitter, sour or sweet. As I have never had supremely high quality stock it is hard to compare. I imagine if you used good, fresh, seasonal vegetables you'd get a stronger, better flavor. I would say though for the cost and overall thriftiness of this recipe I would not want to use any other stock for most everyday uses!

Notes about this recipe: I wasn't able to provide exact measurements for almost anything in this recipe because of nature of using leftovers vegetable scraps so don't concern yourself too much about the amounts. They key is collect scraps and keep them in gallon size freezer bags in your freezer. I think this happens naturally for all of us, but use a variety of scraps. If you use too many of one kind you might get a very strong color or taste in your stock rather than the generic vegetable stock we're looking for.

________________________

Compost Veggie Stock

Prep time: 10 minutes Cook time: Approximately 90 minutes Yields: Varies

Ingredients (for one full gallon bag of vegetable scraps)
  • Aproximately 1/2 gallon worth of Various fresh vegetables, roughly chopped large
    (I highly recommend using no fewer than 3 vegetables to give yourself enough of a variety. Whatever is cheap and/or seasonal might be best. I used tomatoes, broccoli, mushrooms, celery and carrot)
  • 1 cup Onion, chopped (or to your own taste)
  • 1/2 cup cloves of Garlic (or to your own taste)
  • 1-2 tablespoons Olive oil (or enough to lightly coat vegetables)
  • 1 gallon Vegetable scraps (keep in stock pot morning or night before you prepare the stock to allow it to thaw)
  • 4-5 stems of Parsley
  • 4 stems of Basil
  • 2 teaspoons, dried Thyme or 2 tablespoons fresh Thyme
  • 2 Bay leaves
  • 1 cup of white wine
  1. Preheat oven to 400 degrees
  2. Fill a roastings pan with fresh vegetables, garlic and onions. Coat with olive oil.
  3. Roast in oven for about 45 minutes or until vegetables begin to brown. Stir vegetables approximately ever 15 minutes
  4. Dump your roast vegetables into the stock pot with your thawed scraps. Add herbs enough water to cover everything. Stir until it's all mixed together
  5. Bring to boil and then simmer for 20 minutes. If any foam accumulates on top, use a skimmer to remove
  6. Add wine and simmer for another 30 minutes.
  7. Strain through a fine mesh trainer or cheese cloth into a clean container.
  8. If you're not using immediately, store in fridge in air tight container for up to 5 days or freeze for up to 3 months.
Freezing suggestion
  1. Strain again into a measuring cup to remove any remaining bits
  2. Pour 2 cups into a quart sized freezer bag.
  3. Repeat until all the stock you won't be using immediately has been strained and stored in freezer bags
  4. Seal bags pushing as much air out as possible
  5. Store overnight in fridge
  6. Open bags and push as much air out as possible before resealing
  7. Store in freezer until needed
Freezing them this way will help prevent ice crystals from forming. You can store in different amounts, but I like 2 cups so you can be flexible when a recipe calls for vegetable stock. If you happen to have a recipe that calls for an odd number the most you might end up wasting is 1 cup of stock this way.

Saturday, December 25, 2010

Sweet Potato Muffins Take 2: Sweet Potatoes Muffin En Fuego

Fall is succumbing to winter here and so to keep warm I present to you the Sweet Potato Muffin En Fuego!

A few days ago I gave you the first installment of what will be Monthly Muffin. Almost immediately after making the Sweet Potato Muffin, I had the idea of making a savory spicy version of them. Inspired by Alton Brown's Chipotle Smashed Sweet Potatoes, I set forth on converting my sweet sweet potato muffins to Sweet Potato Muffins En Fuego!

To do this first I reduced the brown sugar to 4 tablespoons or 1/4 cup from the original 1/2 cup because while I was aiming for spicy/savory I didn't want to venture too fair away from delicious flavor the original muffin. Then I added 2 tablespoons each of chipotle chili powder and cayenne pepper. I picked the chipotle for the same reason Alton Brown did: chipotles are smoked jalapeƱos so not only do they add some heat they also add a slight hint of smokiness. Finally I added 1/2 teaspoon ground black pepper.

Knowing this muffin would carry a kick and hoping it would be able to function as a side in a meal, I also made a Cinnamon Brown Sugar butter. The butter adds a nice little sweetness to it and helps with the heat, but is totally optional.

Three important notes on this recipe:
1. Last time I forgot to make or add the topping Pioneer Woman used in her pumpkin muffins. I highly recommend it for these. The extra sugar in both the butter and the topping help with the heat without masking it.
2. Both times I did not have ground ginger on hand and was worried about using fresh for baking so I cannot actually vouch for how the ginger will taste, but I still suggest it. In both versions ginger should be right at home!
3. In the recipe before I am going to suggest different amounts of brown sugar and spice than I did above. The way I made them came out with a really strong kick.

Sweet Potato Muffins En Fuego

Prep Time: 20 Minutes | Cook Time: 25 Minutes | Servings: 10-12

Ingredients

Muffin Ingredients:

  • 1 cup All-purpose Flour
  • 6 tablespoons Brown Sugar
  • 2 teaspoons Baking Powder
  • 1 tablespoon Cinnamon
  • ¼ teaspoons Ground Ginger
  • ½ teaspoons Nutmeg
  • teaspoons Salt
  • ½ teaspoons Ground Black Pepper
  • 1 tablespoons Ground Cayenne Pepper (a.k.a. Ground Red Pepper)
  • 1 tablespoons Chipotle Chili Powder (you can also use plain Chili Powder or other Chili Powders)
  • 4 tablespoons Butter, softened
  • 1 cup (heaping) Sweet Potato Puree (mashed/blended sweet potatoes. I don't think this comes canned!)
  • ½ cups Evaporated Milk
  • 1 whole Egg
  • 1-½ teaspoon Vanilla

_____

Topping

  • 2 Tablespoons Sugar
  • 1 teaspoon Cinnamon
  • ¼ teaspoons Nutmeg

_____

For butter:

  • ½ cups Butter, softened
  • 2 tablespoons Heavy Cream
  • 1 tablespoon Cinnamon
  • 2 tablespoons Brown Sugar

Preparation Instructions

Preheat oven to 400 degrees. Generously grease 12 muffin tins.

Combine flour, sugar, baking powder, cinnamon, ginger, nutmeg, salt, pepper, cayenne and chipotle. Mix in butter until it is fully incorporated. In a separate bowl, mix together sweet potato, evaporated milk, egg, and vanilla. Pour sweet potato mixture into the flour mixture. Fold gently until mixture is just combined.

Pour into a greased muffin pan—batter hardly ever fills all twelve unless you keep it down to 1/2 full. Sprinkle with remaining cinnamon-sugar-nutmeg mixture over the top of each unbaked muffin.

Bake for 25 minutes. Allow to cool in pan for 15 minutes, then remove and allow to cool. Ice with cream cheese frosting.

Optional Butter:

Using a mixer or food processor, mix ingredients together. If you like the really soft whipped butter you can let it continue for an extra minute or two. Depending how soft the butter is, you might need to finish mixing manually. Store in fridge and use on muffins or anything else! I also used it on pancakes with maple syrup. Yum!

As always I'd love your thoughts, suggestions and other feedback. At the very least let me know if you tried them.

Tuesday, December 21, 2010

Monthly Muffin: Sweet Potato Muffins

This is the first of hopefully many "Monthly Muffin" posts. Each month I am going to consult with Epicurious's Seasonal Ingredient Map. My rule of thumb is if a farmer is willing to drive to a farmer's market to sell his or her product then the area they hail from is local enough for me. In DC we often get farmers from Maryland, Virginia, West Virginia and Pennsylvania. After selecting seasonal ingredient(s) from one of these states I am going to find or create a muffin recipe for that season and share it with y'all.

This month sweet potatoes are the only seasonal ingredient in Maryland. That worked well for me because I was craving pumpkin muffins and sweet potato while providing a unique flavor, is typically a good substitute for pumpkin. So why trek out to Pennsylvania for pumpkin when my neighbor has sweet potatoes?

I was set on using Smitten Kitchen's recipe for pumpkin muffins, which I am sure are fantastic, but my friend Jane recommend Pioneer Woman's recipe--also for pumpkin muffins. If you're a die hard fan of the pumpkin, I surely plan to do these again with the intended ingredient.

Pioneer Woman used a cupcake style batter, but the s.p. adds some density that certainly makes me think muffin. She does though suggest a cream cheese frosting. I do NOT subscribe to the logic that frosting=cupcakes, but in this case it does push these more toward cupcake land. Frosting was nice, but totally unnecessary.

These muffins were moist, sweet, but not overkill that vaguely reminded me of my mom's sweet potato casserole (sans marshmallows). I can easily see this as breakfast or dessert. MY CHANGES: Aside from swapping pumpkin for sweet potato I also doubled the cinnamon (since I love cinnamon and almost always do this) and used brown sugar rather than white. I also misplaced my nutmeg so this time there was none. I also omitted the golden raisins. I may add them in next time, but I wanted to experience the spices and s.p. all by itself.


Moist Sweet Potato Spice Muffin (adapted from Pioneer Woman)

Prep Time: 20 Minutes | Cook Time: 25 Minutes | Servings: 10-12

Ingredients

Muffin Ingredients:

  • 1 cup All-purpose Flour
  • ½ cups Brown Sugar
  • 2 teaspoons Baking Powder
  • 1 tablespoon Cinnamon
  • ¼ teaspoons Ground Ginger
  • ½ teaspoons Nutmeg
  • ½ teaspoons Salt
  • 4 Tablespoons Butter,
  • 1 cup (heaping) Sweet Potato Puree (mashed/blended sweet potatoes. I don't think this comes canned!)
  • ½ cups Evaporated Milk
  • 1 whole Egg
  • 1-½ teaspoon Vanilla

_____

Topping

  • 2 Tablespoons Sugar
  • 1 teaspoon Cinnamon
  • ¼ teaspoons Nutmeg

_____

For frosting:

  • ¼ cups Softened Butter
  • 4 ounces, weight Cream Cheese
  • ½ pounds Powdered Sugar
  • ½ teaspoons Vanilla

Preparation Instructions

Preheat oven to 400 degrees. Generously grease 12 muffin tins.

Combine flour, sugar, baking powder, cinnamon, ginger, nutmeg, and salt. Mix in butter until it is fully incorporated. In a separate bowl, mix together sweet potato, evaporated milk, egg, and vanilla. Pour pumpkin mixture into the flour mixture. Fold gently until mixture is just combined.

Pour into a greased muffin pan—batter hardly ever fills all twelve unless you keep it down to 1/2 full. Sprinkle with remaining cinnamon-sugar-nutmeg mixture over the top of each unbaked muffin.

Bake for 25 minutes. Allow to cool in pan for 15 minutes, then remove and allow to cool. Ice with cream cheese frosting.

Optional frosting (I actually prefer without):

Mix all ingredients on high until soft and whipped. Spread onto completely cooled muffins, or place into a large pastry bag with a large star tip and go crazy! Store in the fridge, as icing will soften at room temperature.


I actually preferred it without icing, but I wanted to try it out.