Showing posts with label dessert. Show all posts

Friday, January 11, 2013

Peanut Butter Bacon Cookies (and a dog video!)

Happy 2013! It has been far too long since my last blog adventures and to those who read this, I am so sorry! Since my last post I started a new job as kitchen manager at Pleasant Pops Farmhouse Market and Cafe. As the name implies it is an amazing store that is part cafe, part coffee shop, part local market and all delicious. Part of my job running the kitchen has been coming up with recipes for our lunch and dinner menu. As much as I have wanted to share all the amazing soups, salads and sandwiches I have come up with the pesky business of business has prevented me from doing so! I have loved my job, but there is also something about cooking all day that makes cooking for fun (or for a blog) less appealing at the end of the day.

No more! 2013 is a return of a great many things I hold near and dear to my heart. I will cook more, share more and most importantly blog more! In a few days I will be returning to grad school to complete my degree in international development which means I will be part time at my job giving me more mental space to cook for fun and blog about it. With that said, I still hope any of you that are local will come check out Pleasant Pops. Your taste buds will thank you.

January 1st, 2013 wasn't just the start of this year, but also the "birthday" of a somewhat recent friend of mine. Her name is Coco. I could try to describe her, but why tell when I can show, right?

I stole this picture of her from the
dictionary definition of adorable.
Coco entered my life about six months ago at the same time as her absolutely beautiful, amazing, funny and smart owner who happens to be my girlfriend: Caitlin. How lucky can a boy get! A girlfriend and a dog...2012 was pretty wonderful.

So why am I talking about Coco on my cooking blog? Well for her birthday I decided to bring back a recipe I've been working on throughout 2012 and bake her some peanut butter bacon cookies for her birthday. If you don't have a dog in your life I urge you to keep reading! You see, even though I made these cookies with dogs in mind, I can't stop eating them myself. I mean what's not to like?

Peanut butter? yum!
Bacon? delicious!
Cookies? Yes please!

My inspiration was a basic peanut butter cookie. After some research I found out dogs are naturally gluten intolerant, dairy sensitive and even more sensitive to excessive sugar than humans are. With that in mind I replaced the butter with bacon fat, cut out some sugar and turned the cookies gluten free by using oat flour and adding xanthum gum.

What I was left with was a delicious peanut butter cookie with a hint of bacon flavor that was irresistible to all the dogs who tried it and alluring to all the bacon loving humans out there too.

If you're wondering how Coco like her cookies, see for yourself:


Peanut Butter Bacon Cookies (a.k.a. Coco Cookies)

by Leran Minc
Cook Time: 10 minutes
Keywords: bake dessert dog treat gluten-free bacon peanut butter cookie

Ingredients (Approximately 15 cookies)
  • 1/3 cup sugar
  • 1/3 cup brown sugar
  • 1/2 cup bacon fat, melted (see below for instructions)
  • 1 egg
  • 1 teaspoon vanilla extract
  • 1 1/4 cup oat flour or gluten-free flour (see below for instructions)
  • 1/2 teaspoon xanthum gum
  • 3/4 teaspoon baking soda
  • 1/2 teaspoon baking powder
  • 1/4 teaspoon salt
Instructions
For cookies
1. Whisk together sugar, bacon fat and eggs until creamy. Mix in vanilla extract
2. Mix together dry ingredients
3. Stir the dry ingredients into the wet. Since you're not using glutenous flour over mixing is less of a concern.
4. Cover and refrigerate for at least 3 hours. This step will allow the moisture in the cookie dough to redistribute more evenly. You can skip this step, but I think it's worth the wait.
5. Preheat oven to 375°F.
6. Line a cookie sheet with parchment paper. Measure about 2 tablespoons worth of cookie dough and using either a disher or a spoon and your hands roll out balls. Press the balls down to form cookie shapes. These cookies won't collapse and like some cookies so you need to help them out. They will spread though so make sure to keep a few inches between cookies.
7. Bake on 375°F for 9 to 10 minutes. Transfer cookies to a cooling rack. They may be extremely soft at first so be careful, but don't be fooled! They will harden as they cool so don't make my mistake and over bake them.

You can also freeze these. I would suggest rolling out the balls and placing them on a cookie sheet on parchment paper in the freezer. Give enough space for air to flow between them. Once frozen you can transfer them to a container or a freezer bag. Just let them thaw enough to press into cookie shapes before baking.
Powered by Recipage
.

Wednesday, February 29, 2012

Peanut Butter Cup Brownies

On Thursday a friend saw my status advertising the previous recipe as a good winter dish and told me it was time to update my blog, Spring had arrived! If you were in or near DC you may have agreed after our lovely high of 70s sunny day. I even caught myself dreaming of a salad with toasted sunflower seeds, spinach, strawberry vinaigrette and perhaps some early bell peppers. Others may dream of beaches, I dream of salad. Ok, ok, beaches sounds incredible too! How a beach picnic with salad?

Where was I? Oh, right, Spring.... I told her that sadly I don't consider it Spring in a culinary sense until local farms start to sell asparagus. Sadly I was right and this weekend the cold weather is back a vengeance. For being a buzz kill and to help fight us through the last few weeks of windy, cold weather I offer you brownies.

Unless you're the most zealous locavore, I think chocolate and peanut butter is an anytime food. Morning, afternoon, evening, night, Spring, Summer, Fall, Winter, apocalypse, rapture, etc. Give me chocolate with a little bit of peanut butter and I am happy. This recipe is also incredibly easy so if you're feeling the Winter blues here's your cure.

When I say easy, I mean easy because in my early days of baking December of 2008 to be precise, I attempted my first batch of brownies. Brownies that I think six year olds have managed to master, but a 22 year old Leran somehow over-baked into a charred mass of chocolate concrete. In 2012, though, I decided it was high time I overcame my shameful past. The big secret is when you test your brownies the toothpick won't come out clean like muffins, cookies or cakes, but rather it will come out clean-ish.

Also, make sure you have a brownie pan before your batter is ready unless you want to scramble to beg your neighbor to use theirs. This may or may not happened to a certain blogger you know. He may have had to toss out his pan because of an over frozen truffle mixture being impossible to clean. Moving on....


Peanut Butter Cup Brownies

by Leran
Prep Time: 10 minutes
Cook Time: 40 minutes
Keywords: bake dessert vegetarian chocolate peanut butter brownie American
Ingredients (16 brownies)
  • 10 tablespoons (1 1/4 sticks) unsalted butter
  • 1 1/4 cups sugar
  • 3/4 cup plus 2 tablespoons unsweetened cocoa powder (natural)
  • 1/4 teaspoon salt
  • 1 tablespoon milk, half and half or heavy cream
  • 1/2 teaspoon pure vanilla extract
  • 2 large eggs, cold
  • 1/2 cup all-purpose flour
  • 2/3 cup Reese's Minis (frozen, the colder the better... keep in freezer until the last minute)
  • 1/3 cup smooth peanut butter
Instructions
1. Position a rack in the lower third of the oven and preheat the oven to 325°F. Line the bottom and sides of an 8×8-inch square baking pan with parchment paper or foil, leaving an overhang on two opposite sides.
2. Combine the butter, sugar, cocoa, milk and salt in a medium heatproof bowl and set the bowl in a wide skillet of barely simmering water. Stir from time to time until the butter is melted and the mixture is smooth and hot enough that you want to remove your finger fairly quickly after dipping it in to test. Remove the bowl from the skillet and set aside briefly until the mixture is only warm, not hot. It looks fairly gritty at this point, but don’t fret — it smooths out once the eggs and flour are added. (You can try to do this step with a microwave. I would suggest melting the butter and combining the rest of the ingredients and then heating for a little while long ensure they all mix together)
3. Stir in the vanilla with a wooden spoon. Add the eggs. When the batter looks thick, shiny, and well blended, add the flour and stir until you cannot see it any longer, then beat vigorously for 40 strokes with the wooden spoon or a rubber spatula. Stir in Reese's Minis. They will begin to melt as you stir, obviously we want them to melt as little as possible, but don't worry! Spread evenly in the lined pan.
4. Using a spatula or butter knife swirl peanut butter throughout the brownie batter. Do you best not to over mix. I did and it still tasted great, but it would've been better if the peanut butter and chocolate flavors stayed separate.
5. Bake until a toothpick plunged into the center emerges slightly moist with batter. This could take as little at 20 minutes, but it took me closer to 40 minutes so check every 5 minutes after 20. Let cool completely on a rack. (I highly suggest following Deb's advice and putting the entire pan in the freezer for 15-20 minutes to help you cut straight lines.)
6. Lift up the ends of the parchment or foil liner, and transfer the brownies to a cutting board. Cut into 16 or 25 squares.
Powered by Recipage

Friday, May 20, 2011

Spring Means Sangria Time!

About a year ago I was invited to a Memorial Day Barbecue that was BYOB. Not wanting to be a bad guest, but also not being much of a drinker (with the exception of wine) I decided to try my hand at sangria. That spawned a summer of tinkering with various white wine sangria creations. This was by far my favorite. I think its perfect for barbecues, along with spicy foods or just relaxing outside with friends utilizing two of my favorite spring/summer fruits: watermelons and strawberries.

Watermelon-Strawberry White Wine Sangria
Yields approximately 13 cups | Prep: 15 minutes

Ingredients:
  • 1 small seedless watermelon (enough to make 4 cups of watermelon juice)
  • 2 cup strawberries, diced
  • 2 cups lemon-lime soda (I use Sprite, but whatever you like)
  • 2 cups orange juice
  • 1 750ml bottle of white wine (I highly recommend Moscato, the sweeter wine you get, the less likely you'll want or need sugar)
  • 1 lemon, in slices (wash well, but I keep the peel on)
  • 1 lime, in slices (wash well, but I keep the peel on)
  • 1 large orange, in slices cut in half (wash well, but I keep the peel on)
  • Small bunch of fresh mint leaves (optional)
  • Sugar or simple syrup to taste (if the fruits and wine aren't enough)
Directions:
  1. Fill blender with chunks of watermelon, smaller the better. Mash watermelon with a wooden spoon until blender is filled 3/4th or enough to make 4 cups. Alternate pulsing and using the spoon to mash watermelon until the watermelon blends smoothly. Poor juice into pitcher and add mint if desired. Repeat as necessary until you have 4 cups.
  2. Add orange juice and 1 cup of the strawberries to the blender. Blend until smooth and add to pitcher.
  3. Add bottle of wine, soda, lemon, lime, orange and remaining strawberries. Stir and taste. Add sugar or simple syrup as desired.
  4. Chill for at least 2 hours if possible. To keep sangria cold you can turn some of it into ice cubes (pour mixture into ice cube trays and use frozen cubes so when they melt the water doesn't dilute the sangria).

What to do with leftover fruit:
  1. I eat the oranges after. If they're good oranges and they've soaked up all the flavor they're even yummier. If you normally like eating lemons or limes you can do the same for them.
  2. Better, though:
Sangria Strawberry Syrup
(Recipe per cup of leftover strawberries)

Ingredients:
  • 3/4 cup water
  • 1/2 cup sugar
  • 1 cup leftover strawberries from sangria
Directions:
  1. Make a simple syrup by boil water and sugar and stirring until sugar dissolves.
  2. Add strawberries and stir over medium heat until the syrup coats the back of a spoon.

Sunday, February 20, 2011

Monthly Muffin: Maple Syrup Muffins

According to Epicurious there is only one seasonal ingredient in February in Virginia or Maryland... and that would be maple syrup! Who doesn't love maple syrup? I set forth to make the following muffin.

If you're like me, you love pancakes, but you rarely make them. They're delicious, but who has time to make them from scratch in the morning? We could make a lot on the weekend, but if you've had great success in saving pancake batter or reheating pancakes I'd like to hear about it. Pancakes are one of those things I hate to have leftovers of... so what to do? Maple syrup muffins! They keep well, they're portable, you can make a bunch at once and they taste like a maple syrup heavy pancake without feeling sticky after.

Maple Syrup Muffins
Prep time: 30-35 minutes | Yields: 9-10 muffins

Ingredients:
  • 1/4 cup Butter, softened
  • 1/4 cup Brown sugar
  • 1 Egg
  • 1/2 cup Milk
  • 1/2 cup Maple syrup
  • 1 teaspoon Salt
  • 1 1/2 cups Flour
  • 2 teaspoons Baking powder
  • 3/4 cup Oatmeal
  • 1 tablespoon Oatmeal (for topping)
Directions:
  1. Preheat oven to 350 degrees.
  2. In a large bowl mix together butter, sugar and egg.
  3. In separate bowl or measuring cup mix together milk and syrup. Combine with other wet goods.
  4. In a third bowl mix salt, flour, baking powder together.
  5. Add dry ingredients to wet. Stir to combine, but do not mix beyond that.
  6. Add oatmeal, again stir just to combine.
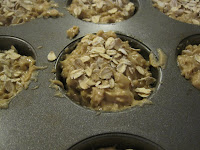
  7. Fill non-stick greased muffin tins with batter. I recommend only fill them about 2/3rds to 3/4th of the way. (As you can see, my muffins grew like crazy!)
  8. Top with remaining oatmeal.
  9. Bake for 20 to 25 minutes or until a toothpick inserted in a muffin comes out clean.
  10. Let cool on a rack