Friday, January 18, 2013

Arugula and Brie Pasta

I was an unusual kid. I never liked salads with greens, I guess that's not unusual, but I loved my vegetables and I absolutely loved broccoli. Like most kids, though, I also really loved pasta. As my tastes matured and I started to learn the beauty of a leafy salad I discovered the deliciousness of arugula. It has a peppery bite that adds to a salad rather than acting as a watery filler like some lettuces.

In 2011 I found this video from a Mark Bittman podcast for an arugula pasta. I was exuberant! A way to take a delicious peppery green and make it into a really heart meal. Out of convenience and ease I left out of the anchovies, but no matter what I did the dish never seemed to work out. The pepperiness just overpowered the dish and I couldn't achieve a balance.

Similarly I keep trying to use leftover amounts of brie to make a pasta, but it's too rich and often times the brie no matter how small I cut it and whatever else I tried the brie would all clump together. Finally this last week I had a stroke of inspiration: arugula, brie and mushrooms with pasta!

The brie provides cheesy richness while the arugula balances it with its pepperiness with the mushrooms sauteed in garlic give it the entire dish a nice earthiness. What you're left with is a cross between a salad and a cheesy pasta. If you like brie, mushrooms and arugula than I'm confident you'll like this dish.

Note: The key to this recipe is to save some of the pasta water. Lots of recipes call for this and I often ignore  it, but it really does help marry the pasta to the sauce. By tossing the brie with the pasta and the pasta water some of it melts and creating a sauce where no sauce existed.


Pasta with Arugula, Brie and Mushrooms

by Leran Minc
Prep Time: 10 minutes
Cook Time: 15 minutes

Ingredients (4-6 servings)
  • 1/4 cup olive oil
  • 1/3 pound mushrooms, sliced and cut in half
  • 3 cloves of garlic, minced
  • 1 pound of pasta (I used penne)
  • 4 ounces of brie (cut into 1/8" cubes)
  • 5 ounces of baby arugula
  • 2 tablespoons of good olive oil (extra virgin works, but if you have something fancy use it!)
  • 2 teaspoons lemon juice (or a few good squeezes of a lemon)
  • 2 teaspoons sea salt
  • 1 teaspoon ground black pepper
Instructions
1. Heat the olive oil over medium heat.
2. Saute mushrooms for 5 minutes until they begin to brown lightly and soften.
3. Add garlic and cook for an additional 10 minutes. Stirring often to avoid burning garlic.
4. Meanwhile cook pasta. Drain, but save pasta water.
5. Toss pasta with mushrooms, garlic, brie and 1/4 cup of the pasta water until brie begins to melt.
6. Add arugula, lemon juice, salt, pepper and additional olive oil and toss until arugula wilts slightly.
7. Serve with bread to make 6 servings or 4 servings alone.
Powered by Recipage

Seasonality of this dish: Arugula is a heartier green that while it isn't seasonal, it preserves its flavor much better out of season and transports better. If you're going to make a compromise to get some freshness in the middle of winter, arugula is a good way to go. Domestic mushrooms are always seasonal and are often produced locally. So anytime you can get arugula this dish works.

Approximate Cost of this Dish

1/3 pound of mushrooms $0.75
1 pound of pasta $1.99 (or less)
4 oz of brie $2.25
5 oz of baby arugula $2.99
1 lemon $0.50
Total= $8.48
Add the cost of olive oil, salt and garlic....~$10.00 or $2.00 per serving

Friday, January 11, 2013

Peanut Butter Bacon Cookies (and a dog video!)

Happy 2013! It has been far too long since my last blog adventures and to those who read this, I am so sorry! Since my last post I started a new job as kitchen manager at Pleasant Pops Farmhouse Market and Cafe. As the name implies it is an amazing store that is part cafe, part coffee shop, part local market and all delicious. Part of my job running the kitchen has been coming up with recipes for our lunch and dinner menu. As much as I have wanted to share all the amazing soups, salads and sandwiches I have come up with the pesky business of business has prevented me from doing so! I have loved my job, but there is also something about cooking all day that makes cooking for fun (or for a blog) less appealing at the end of the day.

No more! 2013 is a return of a great many things I hold near and dear to my heart. I will cook more, share more and most importantly blog more! In a few days I will be returning to grad school to complete my degree in international development which means I will be part time at my job giving me more mental space to cook for fun and blog about it. With that said, I still hope any of you that are local will come check out Pleasant Pops. Your taste buds will thank you.

January 1st, 2013 wasn't just the start of this year, but also the "birthday" of a somewhat recent friend of mine. Her name is Coco. I could try to describe her, but why tell when I can show, right?

I stole this picture of her from the
dictionary definition of adorable.
Coco entered my life about six months ago at the same time as her absolutely beautiful, amazing, funny and smart owner who happens to be my girlfriend: Caitlin. How lucky can a boy get! A girlfriend and a dog...2012 was pretty wonderful.

So why am I talking about Coco on my cooking blog? Well for her birthday I decided to bring back a recipe I've been working on throughout 2012 and bake her some peanut butter bacon cookies for her birthday. If you don't have a dog in your life I urge you to keep reading! You see, even though I made these cookies with dogs in mind, I can't stop eating them myself. I mean what's not to like?

Peanut butter? yum!
Bacon? delicious!
Cookies? Yes please!

My inspiration was a basic peanut butter cookie. After some research I found out dogs are naturally gluten intolerant, dairy sensitive and even more sensitive to excessive sugar than humans are. With that in mind I replaced the butter with bacon fat, cut out some sugar and turned the cookies gluten free by using oat flour and adding xanthum gum.

What I was left with was a delicious peanut butter cookie with a hint of bacon flavor that was irresistible to all the dogs who tried it and alluring to all the bacon loving humans out there too.

If you're wondering how Coco like her cookies, see for yourself:


Peanut Butter Bacon Cookies (a.k.a. Coco Cookies)

by Leran Minc
Cook Time: 10 minutes
Keywords: bake dessert dog treat gluten-free bacon peanut butter cookie

Ingredients (Approximately 15 cookies)
  • 1/3 cup sugar
  • 1/3 cup brown sugar
  • 1/2 cup bacon fat, melted (see below for instructions)
  • 1 egg
  • 1 teaspoon vanilla extract
  • 1 1/4 cup oat flour or gluten-free flour (see below for instructions)
  • 1/2 teaspoon xanthum gum
  • 3/4 teaspoon baking soda
  • 1/2 teaspoon baking powder
  • 1/4 teaspoon salt
Instructions
For cookies
1. Whisk together sugar, bacon fat and eggs until creamy. Mix in vanilla extract
2. Mix together dry ingredients
3. Stir the dry ingredients into the wet. Since you're not using glutenous flour over mixing is less of a concern.
4. Cover and refrigerate for at least 3 hours. This step will allow the moisture in the cookie dough to redistribute more evenly. You can skip this step, but I think it's worth the wait.
5. Preheat oven to 375°F.
6. Line a cookie sheet with parchment paper. Measure about 2 tablespoons worth of cookie dough and using either a disher or a spoon and your hands roll out balls. Press the balls down to form cookie shapes. These cookies won't collapse and like some cookies so you need to help them out. They will spread though so make sure to keep a few inches between cookies.
7. Bake on 375°F for 9 to 10 minutes. Transfer cookies to a cooling rack. They may be extremely soft at first so be careful, but don't be fooled! They will harden as they cool so don't make my mistake and over bake them.

You can also freeze these. I would suggest rolling out the balls and placing them on a cookie sheet on parchment paper in the freezer. Give enough space for air to flow between them. Once frozen you can transfer them to a container or a freezer bag. Just let them thaw enough to press into cookie shapes before baking.
Powered by Recipage
.

Saturday, June 16, 2012

Real Tomatoes!

Last week I had the first tomato of the season and it was absolutely delicious. The best part was not the incredible marriage of natural sugars, acidity and juiciness bundled up in a gorgeous red fruit, but that I
shared this tomato with ten 2nd and 3rd graders. I'm sure that I'll never forget hearing one excitedly say, “I didn’t like tomatoes, but now I think I might.”

This was at the Brookland Farmers Market. When I say first tomato of the season, I mean the first real tomato. Grown by Licking Creek BendFarm in Pennsylvania and trucked in by the farm workers to the folks of DC. The kids were students at DC Prep and part of the Cooking Matters program designed by Share Our Strength and locally organized by the Capital Area Food Bank. I was the culinary instructor for their six week crash course on basic cooking and nutrition. While it was always exciting introducing them to cooking techniques and new flavors, during this class and the one I previous volunteered with I always felt like something was wrong. We were asking the students to try new things or to give old items like tomatoes a second chance, but the produce we were using was the bland varieties sold at the grocery store. These tomatoes were grown by large scale farms and bred for shelf life and transportation, but not for nutrition and certainly not for flavor. The tomatoes we desperately wanted them to like were flavorless, watery and more times than not just plain sad.

I hope those who know me and those who read this blog know that I would far prefer folks eat tomatoes, strawberries, eggs and more from wherever they can get them. Eating whole foods and cooking them should be the first goal, but for some products like those I just named the flavor and quality of local versus conventional is drastic. The little girl last week was just the starkest example yet, but I’ve had many friends who have said they didn’t like tomatoes until trying a “real tomato”.

On my way home, with the last tomato of the day (purchased after our class) safely stowed in my bag, I contemplated my own food journey toward seasonality. Growing up, despite my often picky tastes, I loved the plate of bell pepper, tomato and cucumber my mom would chop up for me at almost every dinner. Despite cooking a lot, it wasn’t until I moved out that I really began to understand the variety of prices and quality of produce when shopping. Even in mild Texas winters the peppers and tomatoes began to look so sad and the price I was paying for them just kept going up. As a poor college student who liked to cook I had to adapt or I’d be paying a lot of money in January to eat an extremely bland Israeli salad.
Thanks to a bargain hunting mom, some seasonality came natural. I eagerly consumed squashes in the fall and watermelon in the summer. Seeking my own bargains and quality produce I slowly learned when things where cheaper and better quality and by the time I moved into the Mount Pleasant neighborhood and began visiting the local farmers market, I had it well engrained in my head that seasonal meant better food at a better price.

And then I discovered heirloom tomatoes…but that’s a story for another time!

As for my precious tomato: you better believe I chopped it up and tossed it with mozzarella, sea salt, pepper and olive oil and ate up all the remaining liquid with some bread that very evening. Easy recipe, but I’ll post it below!

Tomato and Mozzarella Salad

by Leran Minc

Prep Time: 5 minutes

Keywords: raw salad appetizer vegetarian tomato mozzarella summer

Ingredients (Serves 2 (as a side) Serves 1)

  • 1 large Tomato, rough chopped into large pieces
  • 4 oz Mozzarella (any will do, I prefer the small balls aka Ciliegine)
  • 2 tablespoons Extra Virigin Olive Oil
  • 1 teaspoon Sea salt (kosher salt will do)
  • 1/2 teaspoon Fresh ground black pepper

Instructions

1. Combine ingredients in a bowl

2. Serve and enjoy (can't get any easier, right?)

Powered by Recipage

Thursday, March 8, 2012

Roasted Brussels Sprouts and Potatoes

s I lamented in my last post, there is still a little bit of winter to slog through before we get to spring with its asparagus, strawberries and cucumbers followed by the incredible bounty of late spring and summer. So to get us through these last few weeks I decided to use the leftover Brussels sprouts from a recent dish and some incredible potatoes I found at the store to make an easy side dish. Ok ok, I actually ate the whole entire thing as my dinner one night, but I think most folks would agree this seems more fitting along a star like roast chicken or braised meat.

As you can find local Brussels sprouts through the start of spring and potatoes store exceptionally well, this is a great dish to bridge the transition in the seasons. I can easily see myself wrapping the dish in foil and tossing it on the grill next to other grilled vegetables or chicken later this month or early April.

Like most roast veggie dishes, you simply toss all the ingredients in a bowl with oil, spread it on a baking sheet, stick it in the oven and move onto other parts of dinner. Can't get easier than that!

Two small notes... when I first made this I used pine nuts. Don't! While I love pine nuts they really didn't add much to the dish and are among one of the most expensive nuts/seeds. Save yourself the cost and use those pine nuts in some pesto when basil is in season.

Secondly, I highly recommend using Parmesan in this dish. The nutty flavor of Parmesan really enhances the dish, but if you're strictly vegetarian, vegan or trying to keep kosher I will admit that you can still have a great side dish without it.


What are some of your favorite dishes that make use of produce in what Barbara Kingsolver calls "the hungriest month"?

Roasted Brussel Sprouts and Potatoes

by Leran

Prep Time: 5 minutes

Cook Time: 40 minutes

Keywords: roast side vegetarian brussels sprouts parmesan potatoes fall winter

Ingredients (serves 4)

  • 1/2 pound Brussels sprouts, bottoms trimmed
  • 1/2 pound small potatoes, halved
  • 1 teaspoon sea salt
  • 1 teaspoon paprika
  • 2 tablespoons Parmesan cheese, grated (optional, but the nutty, cheesy flavor really makes the dish)
  • 1/4 cup olive oil
  • Additional salt and pepper to taste

Instructions

1. Preheat oven to 400

2. Combine potatoes, Brussels sprouts, spices and half of Parmesan in a bowl.

3. Add olive oil, toss to coat.

4. Line a bottom of a deep baking pan with foil. Spread mixture out as evenly as possible on pan.

5. Cover in foil and bake for 30 minutes.

6. Remove foil. Sprinkle remaining Parmesan cheese and bake uncovered for 10 more minutes.

7. Enjoy!

Powered by Recipage

Wednesday, February 29, 2012

Peanut Butter Cup Brownies

On Thursday a friend saw my status advertising the previous recipe as a good winter dish and told me it was time to update my blog, Spring had arrived! If you were in or near DC you may have agreed after our lovely high of 70s sunny day. I even caught myself dreaming of a salad with toasted sunflower seeds, spinach, strawberry vinaigrette and perhaps some early bell peppers. Others may dream of beaches, I dream of salad. Ok, ok, beaches sounds incredible too! How a beach picnic with salad?

Where was I? Oh, right, Spring.... I told her that sadly I don't consider it Spring in a culinary sense until local farms start to sell asparagus. Sadly I was right and this weekend the cold weather is back a vengeance. For being a buzz kill and to help fight us through the last few weeks of windy, cold weather I offer you brownies.

Unless you're the most zealous locavore, I think chocolate and peanut butter is an anytime food. Morning, afternoon, evening, night, Spring, Summer, Fall, Winter, apocalypse, rapture, etc. Give me chocolate with a little bit of peanut butter and I am happy. This recipe is also incredibly easy so if you're feeling the Winter blues here's your cure.

When I say easy, I mean easy because in my early days of baking December of 2008 to be precise, I attempted my first batch of brownies. Brownies that I think six year olds have managed to master, but a 22 year old Leran somehow over-baked into a charred mass of chocolate concrete. In 2012, though, I decided it was high time I overcame my shameful past. The big secret is when you test your brownies the toothpick won't come out clean like muffins, cookies or cakes, but rather it will come out clean-ish.

Also, make sure you have a brownie pan before your batter is ready unless you want to scramble to beg your neighbor to use theirs. This may or may not happened to a certain blogger you know. He may have had to toss out his pan because of an over frozen truffle mixture being impossible to clean. Moving on....


Peanut Butter Cup Brownies

by Leran
Prep Time: 10 minutes
Cook Time: 40 minutes
Keywords: bake dessert vegetarian chocolate peanut butter brownie American
Ingredients (16 brownies)
  • 10 tablespoons (1 1/4 sticks) unsalted butter
  • 1 1/4 cups sugar
  • 3/4 cup plus 2 tablespoons unsweetened cocoa powder (natural)
  • 1/4 teaspoon salt
  • 1 tablespoon milk, half and half or heavy cream
  • 1/2 teaspoon pure vanilla extract
  • 2 large eggs, cold
  • 1/2 cup all-purpose flour
  • 2/3 cup Reese's Minis (frozen, the colder the better... keep in freezer until the last minute)
  • 1/3 cup smooth peanut butter
Instructions
1. Position a rack in the lower third of the oven and preheat the oven to 325°F. Line the bottom and sides of an 8×8-inch square baking pan with parchment paper or foil, leaving an overhang on two opposite sides.
2. Combine the butter, sugar, cocoa, milk and salt in a medium heatproof bowl and set the bowl in a wide skillet of barely simmering water. Stir from time to time until the butter is melted and the mixture is smooth and hot enough that you want to remove your finger fairly quickly after dipping it in to test. Remove the bowl from the skillet and set aside briefly until the mixture is only warm, not hot. It looks fairly gritty at this point, but don’t fret — it smooths out once the eggs and flour are added. (You can try to do this step with a microwave. I would suggest melting the butter and combining the rest of the ingredients and then heating for a little while long ensure they all mix together)
3. Stir in the vanilla with a wooden spoon. Add the eggs. When the batter looks thick, shiny, and well blended, add the flour and stir until you cannot see it any longer, then beat vigorously for 40 strokes with the wooden spoon or a rubber spatula. Stir in Reese's Minis. They will begin to melt as you stir, obviously we want them to melt as little as possible, but don't worry! Spread evenly in the lined pan.
4. Using a spatula or butter knife swirl peanut butter throughout the brownie batter. Do you best not to over mix. I did and it still tasted great, but it would've been better if the peanut butter and chocolate flavors stayed separate.
5. Bake until a toothpick plunged into the center emerges slightly moist with batter. This could take as little at 20 minutes, but it took me closer to 40 minutes so check every 5 minutes after 20. Let cool completely on a rack. (I highly suggest following Deb's advice and putting the entire pan in the freezer for 15-20 minutes to help you cut straight lines.)
6. Lift up the ends of the parchment or foil liner, and transfer the brownies to a cutting board. Cut into 16 or 25 squares.
Powered by Recipage

Friday, February 17, 2012

Brussels Sprouts Two Ways With Orzo

A few weeks ago I happened to be on my old grad school campus on a Wednesday, which happens to be the same day there is a small farmer's market on campus. Typically the market is breads, cookies and a few other items from Upper Crust Bakery and variety of produce, nuts, dried fruits and other products like honey and maple syrup from an Amish farm in Pennsylvania. A good rule of thumb for aspiring locavores out there is to never pass up a farmers market especially in winter. Fresh local foods are hard to come by and while the market was unsurprisingly dominated by root vegetables I did stumble across a recent addition to my repertoire: Brussels sprouts.

Early last year I embarked on what I called my foodie resolution. While I failed to systematically try or retry foods and post about them, I did grow a new fondness for many foods I previously never had or previously didn't like, blueberries being chief among the items I now love and previously was staunchly ambivalent about.

The two items that did make it onto this blog were Brussels sprouts and bacon and both happen to be in today's dish. Vegetarians, do not fret. I think this dish would be quite delicious without the bacon, but if you happen to be an omnivore and have some bacon in the fridge I would totally encourage it. Also please don't be daunted by the "two ways", I simply wanted to highlight the two things I like best about Brussels sprouts, but you could just pick one if you're crunched for time or wanting to keep things simple.

I "poached" half of the sprouts in butter and garlic until tender and soaked up the flavors. A friend made similar Brussels sprouts for me once and they tasted like a buttery vegetable version of a meatball.

The other half I shredded and roasted in the oven with bacon, olive oil and bacon fat until they turned crispy.

Finally I tossed it all with orzo, toasted pine nuts, sea salt, pepper, red chili flakes, oregano, basil, shaved Parmesan and fresh mozzarella. I particularly suggest fresh mozzarella because the flavor is killer, but the so is the contrast. The outside melts a little, but the inside retains its cool freshness. The best part, though, is that if you get the small balls of fresh mozzarella (ciliegine) they are roughly the same size as the whole Brussels sprouts!

In the end you get a fairly healthy dish dominated by the different flavor profiles of the Brussels sprouts with a little crunch, lots of cheese and lots of flavor.
Brussel Sprouts Two Ways With Orzo

by Leran
Prep Time: 15 minutes
Cook Time: 30 minutes

Ingredients (Serves 6)
  • 1 pound brussel sprouts
  • 1 small white onion, diced
  • 4 strips bacon (optional)
  • 1 pound orza (or other preferred pasta)
  • 2 oz pine nuts
  • 1/2 cup olive oil (if you're using bacon you can replace some of this with bacon fat)
  • 1 cup butter
  • 4 cloves garlic, minced
  • 1/2 teaspoon sea salt
  • 1/2 teaspoon black peppered
  • 1 teaspoon red chili flakes
For garnish (all to taste)
  • Sea salt
  • Freshly ground black pepper
  • Red chili flakes
  • Parmesan cheese (shaved or shredded)
  • Small balls of mozzarella (technically called ciliegine)
Instructions
Roasted Brussels Sprouts
1. Preheat oven to 400 degrees
2. Toast pine nuts while the oven warms up.
3. If using bacon, cook diced bacon in heavy skillet over medium heat for 5 minutes. The bacon won't be fully cooked, but it will be in the oven for awhile. This initial cooking will ensure it gets crispy.
4. Trim bottom, yellow leaves and discolored leaves from sprouts. Wash well. Use half a pound if adding the butter poached sprouts, use full pound if made alone.
5. Using a food processor, grater or mandoline, shred the sprouts until they're individual leaves or Brussels sprout "confetti".
6. Toss sprouts with bacon, bacon fat, olive oil, chili flakes, sea salt, pepper and a bay leaf.
7. Roast until leaves brown and the mixture has a crunch to it. About 30-35 minutes.
For Butter Poached Brussels Sprouts
1. Trim bottom, yellow leaves and discolored leaves from sprouts. Wash well. Careful while trimming and washing to keep sprouts hole. Use half a pound if adding the roasted Brussels sprouts, use full pound if made alone.
2. Melt butter in the tallest, but smallest pot you own.
3. Add garlic and sprouts. Reduce to a simmer and cook until sprouts are tender, about 5 minutes, but no more than 10.
4. Remove from heat. Drain sprouts from butter. You can save the butter to use for garlic bread.
Assembly
1. Prepare orzo (or pasta of choice) regularly.
2. Meanwhile saute onion in olive oil, bacon fat or combination over medium heat until clear.
3. Mix pasta, onion and above recipes together in a large bowl with oregano and basil.
4. When serving add additional seasoning and Parmesan. Add mozzarella last.
5. Serve and enjoy alone or with bread.
Powered by Recipage

Wednesday, February 8, 2012

Update, Excuses, Apologies and Cider!

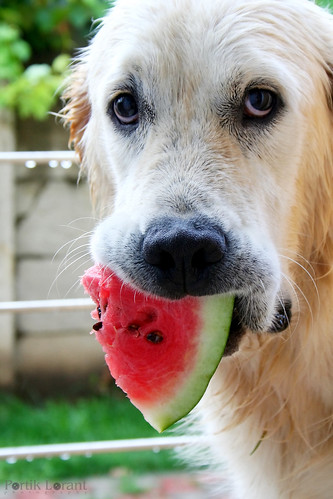
I'm sorry dear readers for neglecting my treasured blog for so long. Many reasons have contributed to this (read on to discover some of them),  but overall I'll admit laziness was a large part of the equation. I know many of the folks who regularly read this blog have worked on blogs of their own so you know how it can be, but please please PLEASE don't mistake my laziness for apathy or lack of love for my fellow foodies. If it helps here is a cute puppy picture to show there is still lots of love:

I want a puppy! Though I'll take a watermelon, yum.
Everyone feeling good? Ready for the semi-legitimate excuses and exciting updates? Let's get it started!

Brunch Farm: I am excited to announce I have launched a little side project/business called Brunch Farm. The idea was originally to make it an eventual food truck, now I'm not sure what the end goal is except to bake some unique muffins and serve them alongside other brunch type foods using local and seasonal ingredients and sell them to incredible people at Grey DC and other similar events. Check out the link or follow us on Twitter @BrunchFarm for updates and future places to try our food.

Eating Mount Pleasant: Another exciting side project that launched this week is Eating Mount Pleasant. I live in an incredible little neighborhood tucked away in northwest DC with a wide range of food including Korean, amazing pizza and a wide variety of Latin American cuisines. My goal for the next year or two is to visit each of the 20+ eateries and write a review. I am going to revisit many of them to review their brunch/breakfast menus and other specialty menus. If  you're in DC or just curious, please check it out. Let me know if you want to come along, I'm always looking for dining companions!

RECIpage: I'm trying something new on the blog and using a service called RECIpage to better organize recipes, make them easier to share and print. Please let me know what you think of this, I hope it makes this blog more useful to y'all. There is also now a "Recipes" page on the navigation bar at the top of this site, all future recipes will be listed there for easy reference. Speaking of which it's cold outside so I think it's time for cider!

I'm not much of an alcohol fan. No particular reason except for taste, but I do like wine and absolutely love hot apple cider. This recipe is perfect for a party or for a long night in with a special someone. Just a little  red wine for flavor and, um, we'll call it winter cheer! You can make this in a slow cooker if you want to free up the stove or keep it warm for hours during a party, but I use a stock pot and it works just as well.

Hot Apple Cider Sangria

by Leran Minc
Prep Time: 5 minutes
Cook Time: 30 minutes
Keywords: beverage vegetarian apple cider red wine Christmas Hanukkah Halloween Thanksgiving fall winter

Ingredients (serves 20)
  • 1 750ml bottle of Red wine
  • 1 gallon Apple cider
  • 6 Cinnamon sticks
  • 2 pounds Apple peeled and diced finely (optional)
Instructions
1. Combine wine, apple cider and cinnamon sticks in a stock pot on medium heat. Bring to boil and reduce to a simmer.
2. Add apples and cook until apples have softened. (optional)
3. Keep on lowest heat possible until ready to serve.
Powered by Recipage

Thursday, September 1, 2011

Vanilla Extract Experiment Phases 1 and 2

My first food love was definitely cooking, but I always found it to be such a false division between those who cook and those who bake. Sure we all specialized or gravitate toward being more artistic or more scientific, but I don't think you can be a great cook without knowing a little about ratios and reactions at least intuitively and likewise when it comes to baking, without that great inspiration of mixing and matching flavors its hard to go beyond chocolate chip cookies. (Not that they aren't delicious!) If you're going to love one, you should love the other.

My mom baked a lot and when I went to college I started doing the same. There are two ingredients I almost always use more than the recipe calls for: cinnamon and vanilla extract. I am starting to work on a bunch of muffin recipes and after seeing a few videos on how to make vanilla extract I decided I should try it!

Seems simple enough... join me on the journey:

Phase 1: Gathering the Ingredients

Vanilla: Apparently vanilla is the 2nd most expensive spice in the world after saffron (Joy of Baking). So being the recent graduate student and food truck worker that I am, I had to set sail on the world wide web and find the best deal. If you find a better deal, let me know, but so far it seems Beanilla seems to have the best prices with a Tahitian pod costing $1.25 or 10 for $7.99. So far all I know is the smell but it's absolutely intoxicating. My roommate was joking that I was getting high off the beans. If there is an intoxicating effect I sure was feeling it!

Mason Jar: Some sites suggest you can use the bottle of booze, but I wanted a wider mouthed jar and a good seal so I opted for a mason jar. You know those jars people use for canning. Well I had a dual purpose for getting a 12 pack of quart sized mason jars and I'll give you one guess. That's right canning will likely be an upcoming post! I chose Ball Mason Jars because they have a pretty good reputation and you can order online and pick-up at an Ace Hardware for $11.49

Vodka: Supposedly any 80 proof alcohol should work to soak up the flavor of the bean with lighter or weaker flavored alcohols giving you a purer vanilla taste. To me vodka tastes like water with some fire and rubbing alcohol mixed in (sorry vodka fans... and Russians), so it seemed the closest to giving a neutral taste. Some websites recommend rum to impart a little rum flavor with the vanilla for certain recipes. I've also read of bourbon used for a similar reason.
Being ignorant of most alcohol except for some wines, I decided to go with low to middle shelf classic: Smirnoff. (Quick Yakov Smirnoff style joke: Soviet Russia, vanilla extracts you!... now back to your regular scheduled blog).

Phase 2: The Process (Recipe)

Vanilla extract actually couldn't be easier.
  1. Use a sharp paring knife to cut a slit down one of the flat sides of each pod.
  2. Place pods in a mason jar or any other tight sealing jar. Alternatively you can empty the alcohol bottle and place the vanilla pods into the bottle.
  3. Fill jar with your chosen alcohol enough until pods are covered (or close... I'm hoping my slightly exposed beans don't cause any issues!)
  4. Seal jar (if you're worried you can follow the steps to properly seal a mason jar, I was lazy and just screwed it shut)
  5. Give the jar of extract a good shake. *Insert lousy shakeweight joke here*
  6. Store in a dark space and shake a few times a week for a minimum of a month. At least 2 months seem to be recommended and 6 months according to Ina Garten (the Barefoot Contessa) is optimal. You'll know it's ready or close to ready when it's nice and dark.
I will be following up with a blog about the finished product and tweeting if not blogging with pictures of my extract at each week. I'm also going to include ways to use the soaked pods (apparently it's easy to squeeze out a vanilla paste) and how to replenish your extract (add more beans occasionally and refill vodka to the top).
Bottom Line

You may have wondered why I included prices in phase 1. Well I have two reasons to make my own vanilla: First is the reason to make almost anything at home. To control the ingredients and quality. This way I know the beans, booze and bottle (rather jar, but alliteration is fun) that are used.

Secondly it ends up being much cheaper. Here's some math for you. Yes I know you like math.

750ml bottle of vodka: $14.29
32oz mason jar (12.18/12): $1.02
10 Tahitian vanilla bean pods: + $11.60
$26.91 for roughly 750ml (or 25.36 ounces) of extract

As opposed to the vanilla I buy at Giant which is $3.14 for 2 ounces or $39.82 for the same 750ml/25.36 ounces.

So I saved $12.91... but wait! As I will explore in a future blog, the pods can be reused and recycled either for more extract or for their vanilla flavor rich innards. so that $12.91 is just the initial savings. So next time around I might not need as many pods and I will already have a jar. Now to steal some vodka at parties. Think anyone will notice the distinct smell of vanilla when I randomly open my extract and dump some vodka in and run?

Stay tuned food fans!

Wednesday, August 3, 2011

Goodness Gracious Great Gazpacho

A few weeks ago while working on The Big Cheese, I helped make the inaugural batch of the gazpacho. After about an hour of tinkering we finally had a really good gazpacho! The problem was we would never be able to recreate it: during the first few steps we used over twice the instructed vinegar and kept adding ingredient after ingredient until we were happy.

Another food truck chef working in the kitchen finally pulled out his copy of the Professional Chef (an amazing cookbook from the CIA--Culinary Institute of America--an excellent gift if you ever are wondering what your favorite foodventurer might want). In it was a classic, simple gazpacho recipe. After adding a bit more of flavors I love, I came up with what I would venture to say is the perfect summer gazpacho with just enough spice and acidity to keep your tastebuds happy, but the fresh and cold veggie flavor that epitomize gazpacho.

For those who are unfamiliar gazpacho is a cold soup traditionally with tomato, cucumbers, olive oil and vinegar originated from Spain. There are many variations like watermelon and white bean, but for now we'll stick to the fundamentals!

I think this is a case where peeled roma or plum tomatoes from a can are more than acceptable, unless you have some heirloom tomatoes. Then I would use those and peel them.

Mostly Traditional Tomato Gazpacho
Prep Time: 15 minutes | Standby Time: 1 hour to 10 hours | Serves 4

Ingredients for soup:
  • 4lbs Tomatoes, peeled and diced plum, roma or any heirloom varietal
  • 1/2lb Green bell peppers, diced
  • 1/2lb Cucumbers, peeled and diced
  • 1/4lb Spanish (white) onion, diced
  • 3 cloves Garlic, diced find or minced
  • 1 cup Olive oil
  • 1/2 cup Red wine vinegar
  • 1 teaspoon Paprika
  • 1/2 teaspoon Cumin
  • Salt and Pepper to taste
Ingredients for garnish:
  • 1/2lb Tomato, diced (plum, roma or heirloom)
  • 1/4lb Green bell pepper, diced
  • 1/4lb Cucumber, peeled and diced
  • 1/8lb Bread or Croutons, diced small (I recommend a whole wheat without seeds or a sourdough)
Directions:
  1. Mix diced veggies, spices, olive oil and vinegar in a large bowl or pot and chill for at least an hour. Overnight is ideal.
  2. Using a hand blender or in batches in a food processor or blender puree soup to desired texture. (I blend until there are no clear chunks of onion or garlic)
  3. Add garnish and serve cold with a salad, sandwich, grilled cheese or alone!

Sunday, June 19, 2011

French Toast a la Alton Brown

Perhaps its not readily evident by this blog, but if you know me, you know I love brunch, breakfast, brinner... you take your pick: if starts with the letters 'b' and 'r' and describes a meal, chances are that I love it. As its Father's Day, if you happen to be waking up late and find your parental unit still hasn't had sustenance or is a brunch minded individual, you can whip this up rather quickly. Otherwise, tuck this away from later this week as a belated gift or to enjoy for yourself next weekend.

So as the title implies, this is not an original recipe. In fact you can get the Food Network version here or watch AB make it on Good Eats here:

One thing Alton Brown leaves out that I think is CRUCIAL to French Toast is cinnamon. Now you could say that would be Cinnamon Toast and French Toast doesn't necessarily need cinnamon, but does grilled cheese need tomato or tomato soup? Exactly!

I also highly recommend using challah. I really have no logic for this except that challah, like cinnamon, is ingrained my mind as the best for French Toast.

Copied and pasted for your ease (with my addition):

Alton Brown's French Toast
Prep: 34 minutes | Yields: 4 servings

Ingredients:
  • 1 cup half-and-half
  • 3 eggs
  • 2 tablespoons honey, warmed in microwave
  • 1/4 teaspoon salt
  • 8 (1/2 inch) slices of day-old challah (or brioche, country bread, etc.). I used raisin challah, but plain, chocolate chip, etc all would work.
  • Butter (enough to grease your pan)
Directions:
  1. In medium size mixing bowl, whisk together the half-and-half, eggs, honey, cinnamon and salt. You may do this the night before. When ready to cook, pour custard mixture into a pie pan and set aside.
  2. Preheat oven to 375 degrees F.
  3. If you made custard mixture the night before, stir again to make sure cinnamon is well incorporated.
  4. Dip bread into mixture, allow to soak for 30 seconds on each side, and then remove to a cooling rack that is sitting in a sheet pan, and allow to sit for 1 to 2 minutes.
  5. Over medium-low heat, melt butter in a 10-inch nonstick saute pan.
  6. Place 2 slices of bread at a time into the pan and cook until golden brown, approximately 2 to 3 minutes per side.
  7. Remove from pan and place on rack in oven for 5 minutes.
  8. Repeat with all 8 slices. Serve immediately with maple syrup, whipped cream or fruit.
As you might notice from my French Toast, I used strawberry syrup. From my Maple Syrup Muffins, you know I love maple syrup, but sometimes you're out of it, the real stuff is cost-prohibitive or you're in the mood for something else. Fruit syrups are incredibly simple:
Simple Fruit Syrup
Ingredients (for 2 cups):
  • 1 cup water
  • 1 cup white sugar
  • 1 1/2 cup of fruit diced
Directions:
  1. Bring water and sugar to boil, simmer and whisk continually until sugar is dissolved.
  2. Add fruit and return to boil and then simmer until syrup is thick enough to coat back of a spoon.
  3. Optional: I prefer my syrup as is, but if you want it thick without chunks you can blend it. If you want it smooth you can strain the fruit pieces out. This is totally up to personal preference and/or application.

Tuesday, June 14, 2011

Food Memories of My Dad (and Win a Gift For Yours)

My dad has been on my mind a lot more than usual lately. While I tell some personal stories on this blog, you may or may not know that my dad died when I was eleven. One of my favorite things growing up was my parent’s homemade pancakes. They didn’t look like the classic pancakes you might be familiar with… they were some sort of crepe/pancake hybrid. They were delicious with syrup, but even better with fresh fruit and Nutella. Made from staples we almost always had on hand and could be whipped on a few minutes’ notice. Before he died, my dad was the one who made the pancakes. In his tongue-in-cheek boastful manner he would proclaim that his pancakes were “top of the line!”


Aside from these delicious pancakes, my dad also introduced me to the simple joys of food. He would wake up very early before heading out to play tennis, racquetball or to see some early clients for his appliance repair business. He would usually watch Good Morning America and eat a big bowl of fresh fruit and plain yogurt. The rare mornings I got up while he was still eating, he would offer me some. While I preferred sweeter yogurts, I grew to love the mixture of the tangy plain yogurt and the sweet fresh fruit.

My dad was an incredible father. He made his family and his community high priorities. While he worked hard, he was always there for his family from coming home early to spend evenings with us, encourage us in our school work and help us any way he could or in any way we asked. Never could we doubt his love because he constantly showered us with affection.

Both he and my mom loved entertaining people and cooking for guests. They rarely made anything fancy, but they made good honest, fresh food and served it to people they loved. In honor of him I would like to invite you to share your stories of your dad and food. At random I will award two people a prize: I will help one local (DC area) celebrate their dad by cooking or baking with them in honor of Father’s Day and I will help one non-local plan a menu including recipes and a shopping list for a Father’s Day meal. Just share your stories and you could win foodventure for that fantastic father figure in your life.

Friday, May 20, 2011

Spring Means Sangria Time!

About a year ago I was invited to a Memorial Day Barbecue that was BYOB. Not wanting to be a bad guest, but also not being much of a drinker (with the exception of wine) I decided to try my hand at sangria. That spawned a summer of tinkering with various white wine sangria creations. This was by far my favorite. I think its perfect for barbecues, along with spicy foods or just relaxing outside with friends utilizing two of my favorite spring/summer fruits: watermelons and strawberries.

Watermelon-Strawberry White Wine Sangria
Yields approximately 13 cups | Prep: 15 minutes

Ingredients:
  • 1 small seedless watermelon (enough to make 4 cups of watermelon juice)
  • 2 cup strawberries, diced
  • 2 cups lemon-lime soda (I use Sprite, but whatever you like)
  • 2 cups orange juice
  • 1 750ml bottle of white wine (I highly recommend Moscato, the sweeter wine you get, the less likely you'll want or need sugar)
  • 1 lemon, in slices (wash well, but I keep the peel on)
  • 1 lime, in slices (wash well, but I keep the peel on)
  • 1 large orange, in slices cut in half (wash well, but I keep the peel on)
  • Small bunch of fresh mint leaves (optional)
  • Sugar or simple syrup to taste (if the fruits and wine aren't enough)
Directions:
  1. Fill blender with chunks of watermelon, smaller the better. Mash watermelon with a wooden spoon until blender is filled 3/4th or enough to make 4 cups. Alternate pulsing and using the spoon to mash watermelon until the watermelon blends smoothly. Poor juice into pitcher and add mint if desired. Repeat as necessary until you have 4 cups.
  2. Add orange juice and 1 cup of the strawberries to the blender. Blend until smooth and add to pitcher.
  3. Add bottle of wine, soda, lemon, lime, orange and remaining strawberries. Stir and taste. Add sugar or simple syrup as desired.
  4. Chill for at least 2 hours if possible. To keep sangria cold you can turn some of it into ice cubes (pour mixture into ice cube trays and use frozen cubes so when they melt the water doesn't dilute the sangria).

What to do with leftover fruit:
  1. I eat the oranges after. If they're good oranges and they've soaked up all the flavor they're even yummier. If you normally like eating lemons or limes you can do the same for them.
  2. Better, though:
Sangria Strawberry Syrup
(Recipe per cup of leftover strawberries)

Ingredients:
  • 3/4 cup water
  • 1/2 cup sugar
  • 1 cup leftover strawberries from sangria
Directions:
  1. Make a simple syrup by boil water and sugar and stirring until sugar dissolves.
  2. Add strawberries and stir over medium heat until the syrup coats the back of a spoon.

Thursday, May 12, 2011

Tips for the Market

This last Saturday was one of my favorite days of the year: opening day for my two neighborhood farmer's markets. For any of you playing at home that would be the Mt. Pleasant Farmers' Market and the Columbia Heights Community Marketplace in D.C. I went to both almost every weekend last season and as long as I'm in town will plan to do the same this year. After a year of being a loyal market going I have compiled a ten tips for you. I very much invite you to comment with your tips. This is a post I will likely add to, revise and occasionally revisit.

Not in D.C.? Find your local market here: http://www.localharvest.org/

1. Go Early!

While most vendors plan well and will have enough for most of their time at the market, some things do sell out and the choosiest of market goers will have dug through the crates, baskets and other containers to find the best produce. The earlier you go the more selection you have. At start and end of a particular items season there also might be less product so some things may sell out especially if they're popular (i.e. strawberries).

While I don't recommend going late, I do enjoy sleeping in on Saturdays and have ended up going to the end of the market more days that I would like to admit. Sometimes this can work in your favor. Some vendors will want to get rid of their products so they will be more willing to haggle or offer good deals, particularly if your market has a baker who wants to sell things before they go stale. If you sleep in or can't go until late, keep your eyes peeled for such deals.

2. Explore and Take Your Time!

This might sound obvious, but I often wait until I've walked through both markets before making purchases. You might want some strawberries and the first vendor you see has some incredible looking strawberries for $5 a pint. You buy one and 10 minutes later there are even better looking strawberries for only $4 a pint! If you're on a budget always explore first.

Most vendors have samples and you should taste, talk and listen before buying. Sometimes you'll decide on buying something different than you planned, but since you explored first you might walk away happier than if you just rushed in, bought your strawberries and left before spotting that incredible goat's milk fudge and its free samples.

There is a reason many markets have performers and family friendly activities. They want you to take your time and enjoy the sights, smells and of course tastes of the market.

3. Talk to the Vendors

There's a few key differences between shopping at a Far Mar and even going somewhere like Whole Foods. The people selling you the products at a FM are often the people who grew or crafted the stuff you're buying. If they're not, they are likely family members or dedicated volunteers. They come to the FM for a reason, they want to sell their stuff personally! Take advantage of this fact.

Every vendor I've ever met at my two local markets and the handful of others I've visited are incredibly friendly. They want you to know about those apples they grow and the best ways to use them. Not only do they want you to enjoy them so much that you come back for more, but they also put their own sweat, blood and tears into bringing those apples to you!

For example, take Upper Crust Bakery that goes to the Columbia Heights Marketplace and to the small FM at the American University campus. He has seen me at both markets repeatedly and I love his black olive bread. Whenever its sold out though I ask him what's good. Last weekend he told me about each bread in detail, what they are best for and how to best preserve them. As friendly as the folks at many grocery stores can be, I don't think you'd get that kind of attention almost anywhere unless you find a good mom and pop shop. So don't be afraid to ask all the questions you want.

Also be sure to listen to other customers questions. Eavesdrop! This is a community event and a learning opportunity, not just a run to the store.

4. Know Seasonality

You might assume that since most market vendors are organic or near organic farmers that everything they will sell you is in season: wrong! As I said above, the vendors are incredibly friendly and are trying to bring you decent products at fairly reasonable prices, but occasionally they'll try to make a few extra dollars by bringing something that is a little early or continue to sell things a few weeks after their peak season.

Is this bad? No! But if you don't know seasonality you might not be happy with the flavors you end up with back at home. Or you'll be paying a lot more when there are great seasonal alternatives nearby. If you don't know what's seasonal you can check this handy Peak-Season Map or use the seasonal foods app on this blog.

Should you always avoid things that are non-seasonal? Not at all! Going with the previous tip, I would talk to the vendor. Sometimes they are able to store things in cellars or barrels and keep them almost as fresh as if they were in peak season. By asking questions or doing a little research you can enjoy apples in the Spring. Additionally, by knowing seasonality you can also be informed with your purchases. Strawberry season over, but a vendor is selling them cheap? Might still be worth it! But if the season is over and the price seems high I would stay away.

5. Subscribe to Newsletters

While I absolutely think you should follow tip #2 and explore, sometimes it is good to plan ahead. Many markets are on Facebook or have an e-mail newsletter. By being on it you can know what will be offered that weekend, if hours have changed and if any new vendors will be showing up.

At my local market, there is a Salvadorian Co-op that grills meat fresh at the market and makes different plates including some great tacos. Even if your market is more strictly produce, its always nice to know your market will have multiple vendors selling broccoli before you stock up at the store the day before. I promise, enjoying some specialty like those great tacos or having higher quality local produce rather than store bought is worth one additional e-mail a week.

6. Set a Budget

If you're like me and you're a student or otherwise on a budget this might be a necessity. If you're not I would still highly recommend setting a budget. While I've noticed prices at the market aren't much higher than the store for most items, it does add up. By setting a budget and following Tip #2 "Explore" you can make the most of your day at the market.

This works both ways. Sometimes I set my budget and find that I am way underbudget and so I can indulge on one the crafted items like fudge, sausages or apple cider. Why regret not splurging when you could've done so without breaking the bank? On the other hand... you can easily go overbudget. If you've explored, tasted and spoke to vendors you can make it home and be very satisfied with your bounty without buyer's remorse.

Have trouble sticking to a budget? Here's some advice: most vendors will only accept cash or highly prefer cash. While I'm typically a credit card kind of guy, I take only the amount of cash I am prepared to spend that day and leave the rest at home. Impossible to go overbudget then and easier to see that you still have plenty of cash to splurge with!

7. Taste, taste, taste!

I don't think I have to go into much detail on this one. While some stores provide a lot of samples, overall I think this is an advantage of a FM. Like I said above, most markets want the experience to be a community even as well as a shopping trip. Take your time, talk to the vendors and even if they don't have samples available don't be shy about asking for some. Many vendors are more than happy to do so.

8. Develop Loyalty

This is just an extension of talking to vendors. Some folks (present company included) like the philosophy of a FM that you know where your food is coming from and might even meet someone heavily involved in growing, producing or creating it. If there is a vendor you like to talk to who consistently gives you extra samples or sells items you like, keep going to them. Not only do they begin to recognize you and want to give you more samples, but they'll often give you extra tips and deals. In my opinion it is well worth paying an extra 50 cents/lb for something if it is coming from your favorite vendor.

9. Be Open-Minded

Did you go to the market in May hoping to get some strawberries and watermelon, but found out that both aren't quite in season yet? Try something else! Maybe you can find a good recipe for rhubarb! Or you get some yogurt and cheese instead of produce that week. At first you might think it was silly to spend more money on products you normally get at the store, but after a few meals using better quality ingredients you might be happy with the results.

Bottom-line, if something looks good and you haven't exceeded your budget you should really think about getting it! Might be a pleasant treat for the week.

10. It's OK to Walk Away Empty Handed

Contrary to the previous tip, if you really didn't like the look of the produce that week and just didn't see anything that got you excited... that's OK. This last week was a perfect example for me. Being the first day of the season, most vendors were selling start plants for gardens rather than produce and I had already planted my garden. My bounty on Saturday was far smaller and less costly than planned.

I followed Tip #9, but I still ended up spending less than I had budgeted. While you should explore, taste and be open-minded, if you really don't want to get anything then just save that money for the grocery store or better yet having a bigger budget for next week when those strawberries will hopefully show up!


As I said, please share your tips and ideas. Most of all go experience your local farmer's market!